New to Shelf-Snap? Here's exactly how I do my workflow — from a shelf full of stuff to a batch that's ready to drop into a Whatnot show. Follow these steps in order and you'll have your first listing exported in a few minutes.
1Make a template
This is where you put in all the information and details that are required for every listing but that you don't change — like Hazmat, and so on. BUT you can also make templates for certain categories or subcategories you sell in. Anything, really. A template just saves you from re-typing the same stuff on every single item.
2Start a batch
On the home screen, press the purple + and either create a batch for a live show or for your BIN shop. A batch is just the bucket all your items go into before you export them together.
3Add your items
Click into the batch, then click on the purple + again to add an item. If you've created a template you can use it — click "Use a template" — or you can start from scratch.
4Add all your item details
Fill in the rest of the item's details. To see your photos larger, or to edit them, long press (press and hold your finger) on any photo to bring up the photo manager.
Inside the photo manager you can: do background removal (iPhone), crop, straighten, rotate, or reorder your photos (just press and drag them to reorder). It's worth getting your main photo looking sharp here — it's the first thing a buyer sees.
5Use Snap-Search
Once you have photos in, you can use Snap-Search — it'll help identify the item and bring up a title and description. If you know the maker or brand, type that in, then click "Snap-Search." It takes a few seconds (we're working on that!). Then you can either accept or dismiss the drafted title and description.
When you're done, click Save, Save & Done, or Save & Add Another.
6Export & import to Whatnot
When you're looking at your batch, click the black Export CSV button towards the bottom of the screen. Click "Save to Files," then "Save."
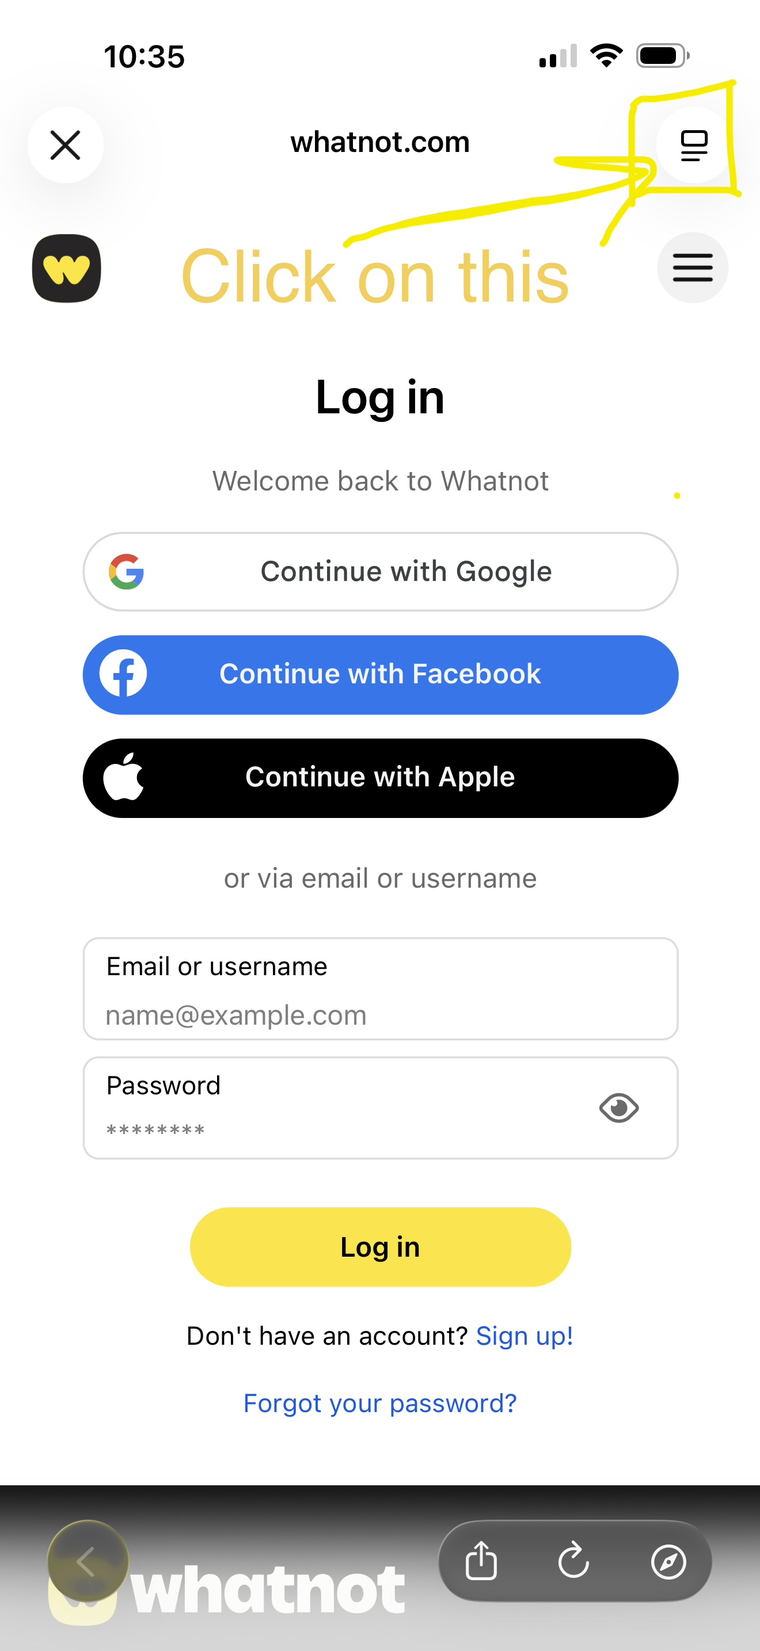
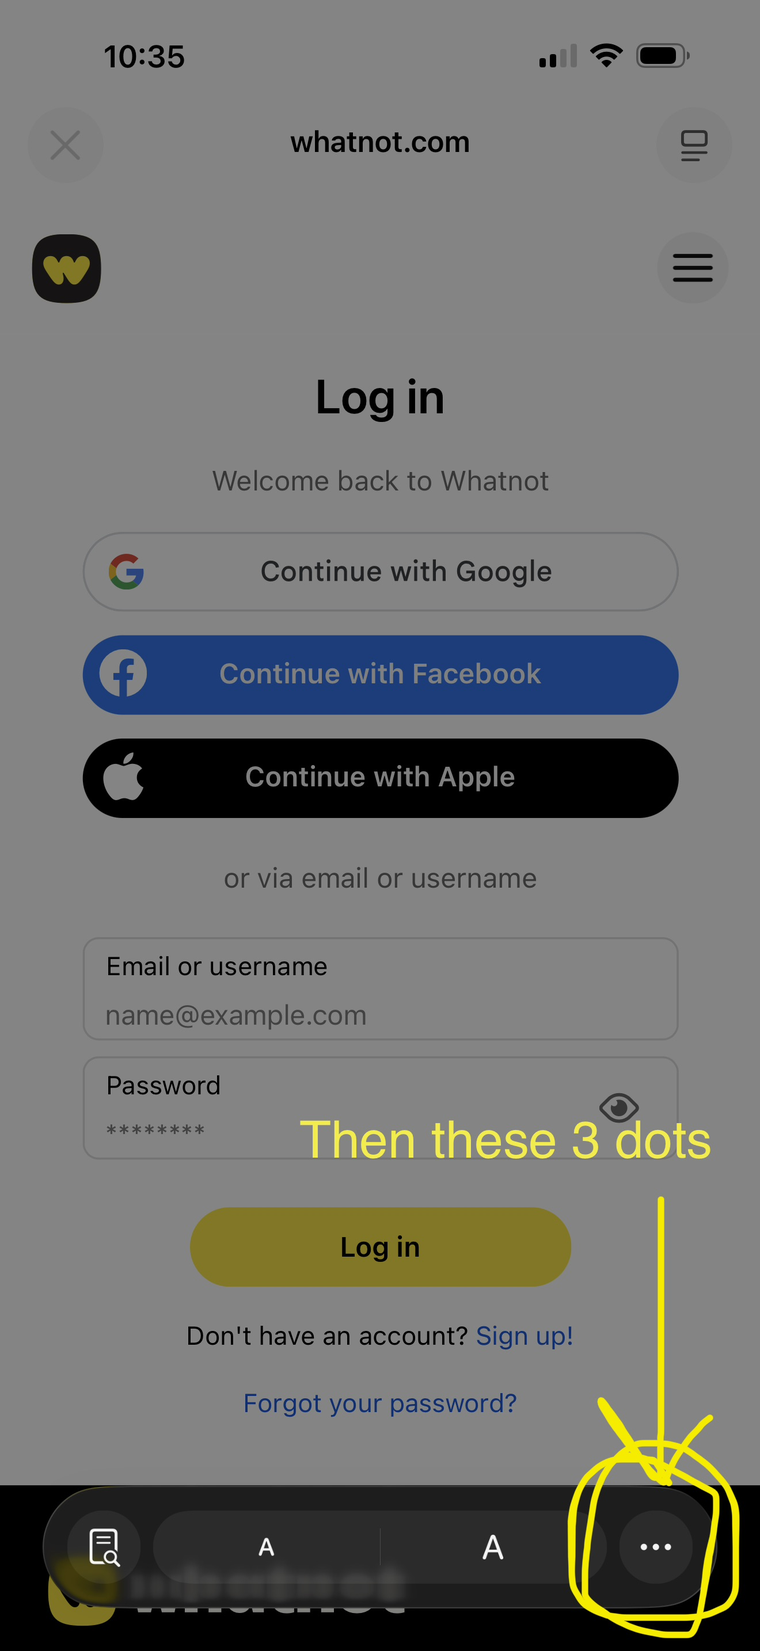
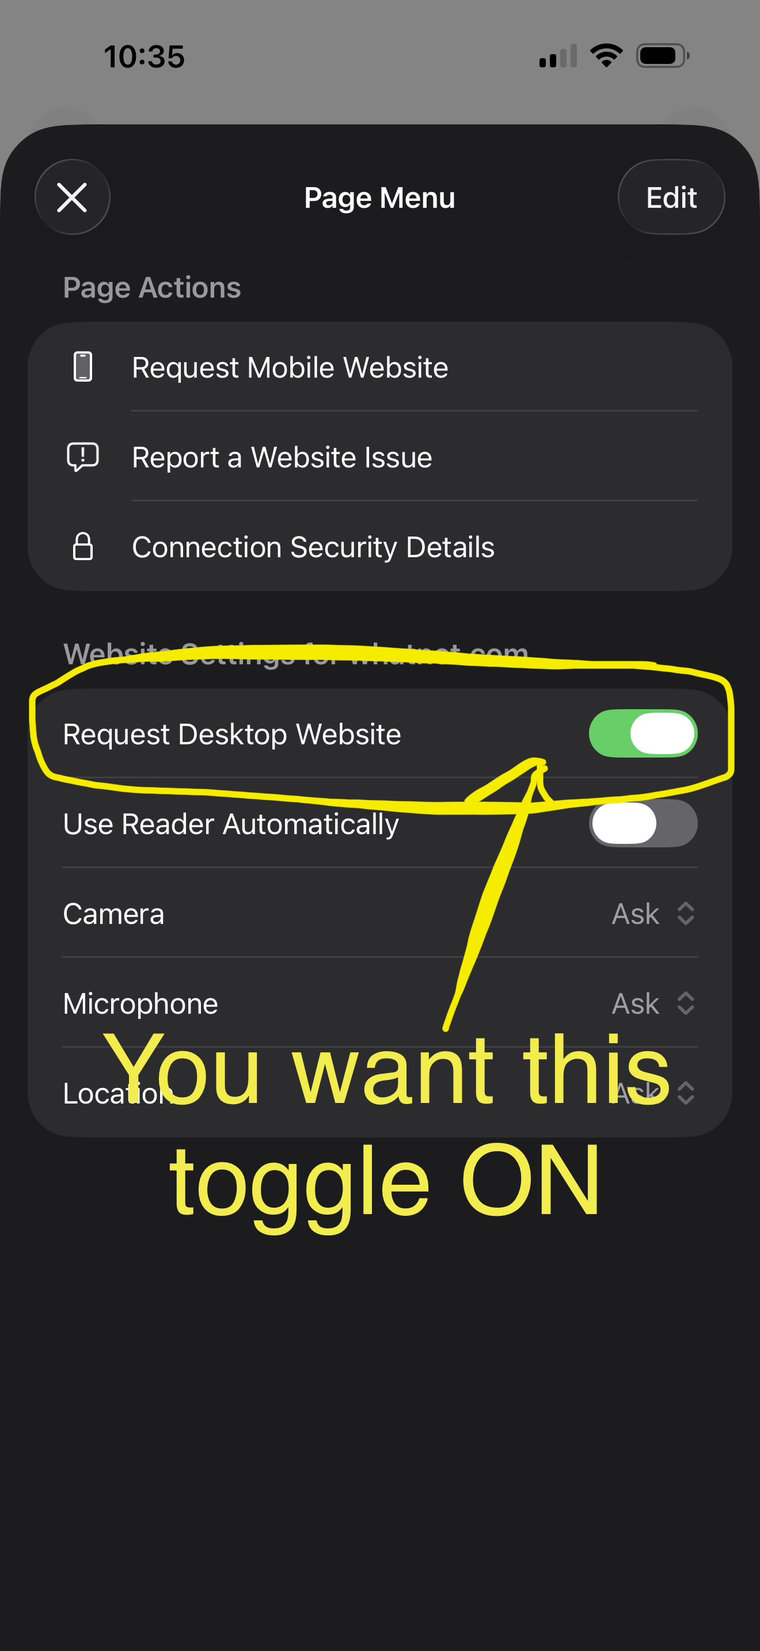
AFTER you export your batch, click the purple Import to Whatnot button. This brings you to your Whatnot sign-in. Log in, then make sure your phone browser is set to display the desktop website (you only need to do this once). Here are some screenshots walking you through it — it's tricky if you've never done it before.
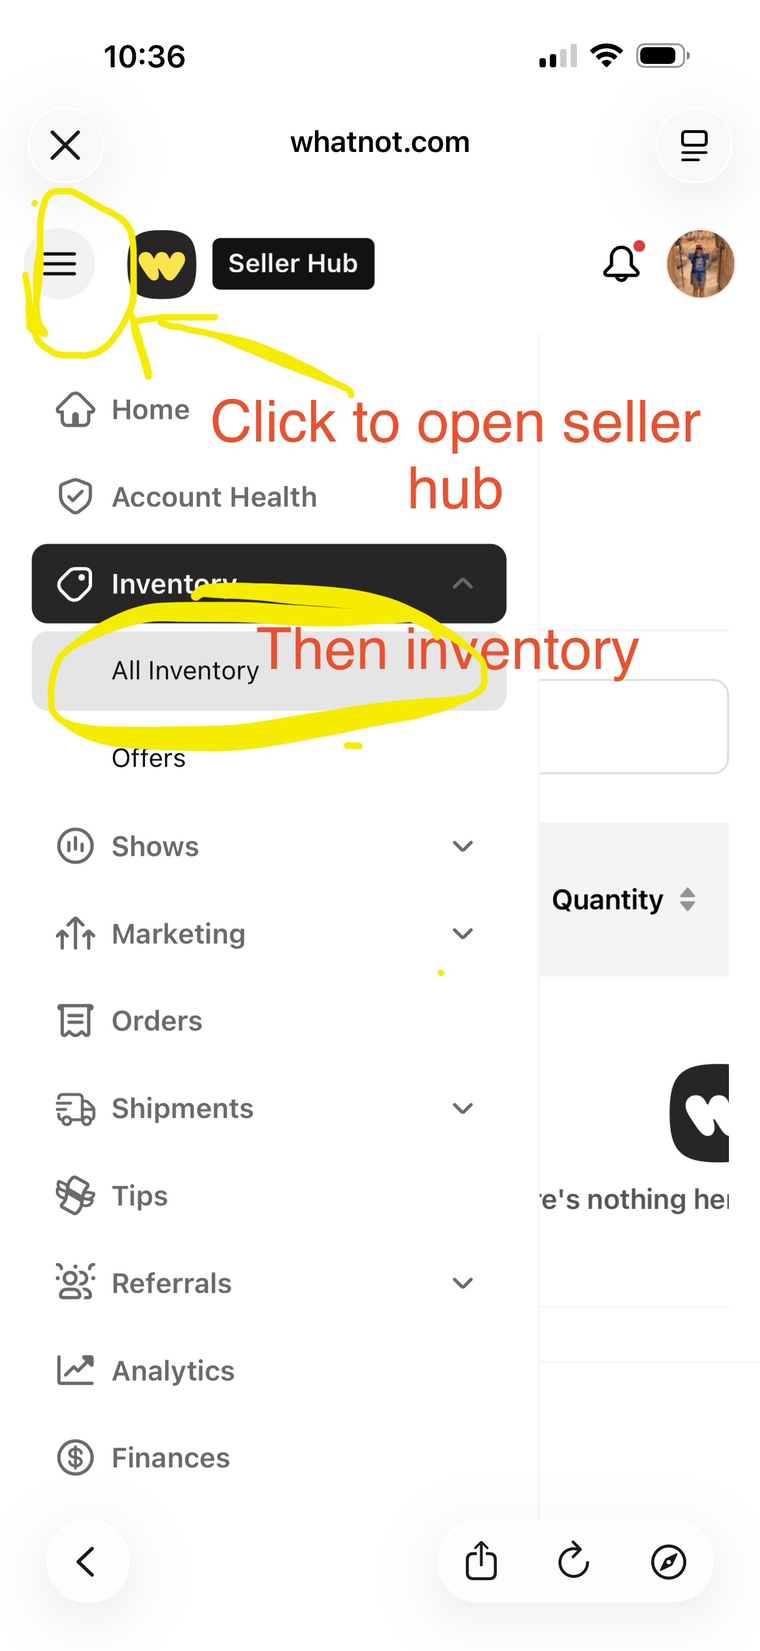
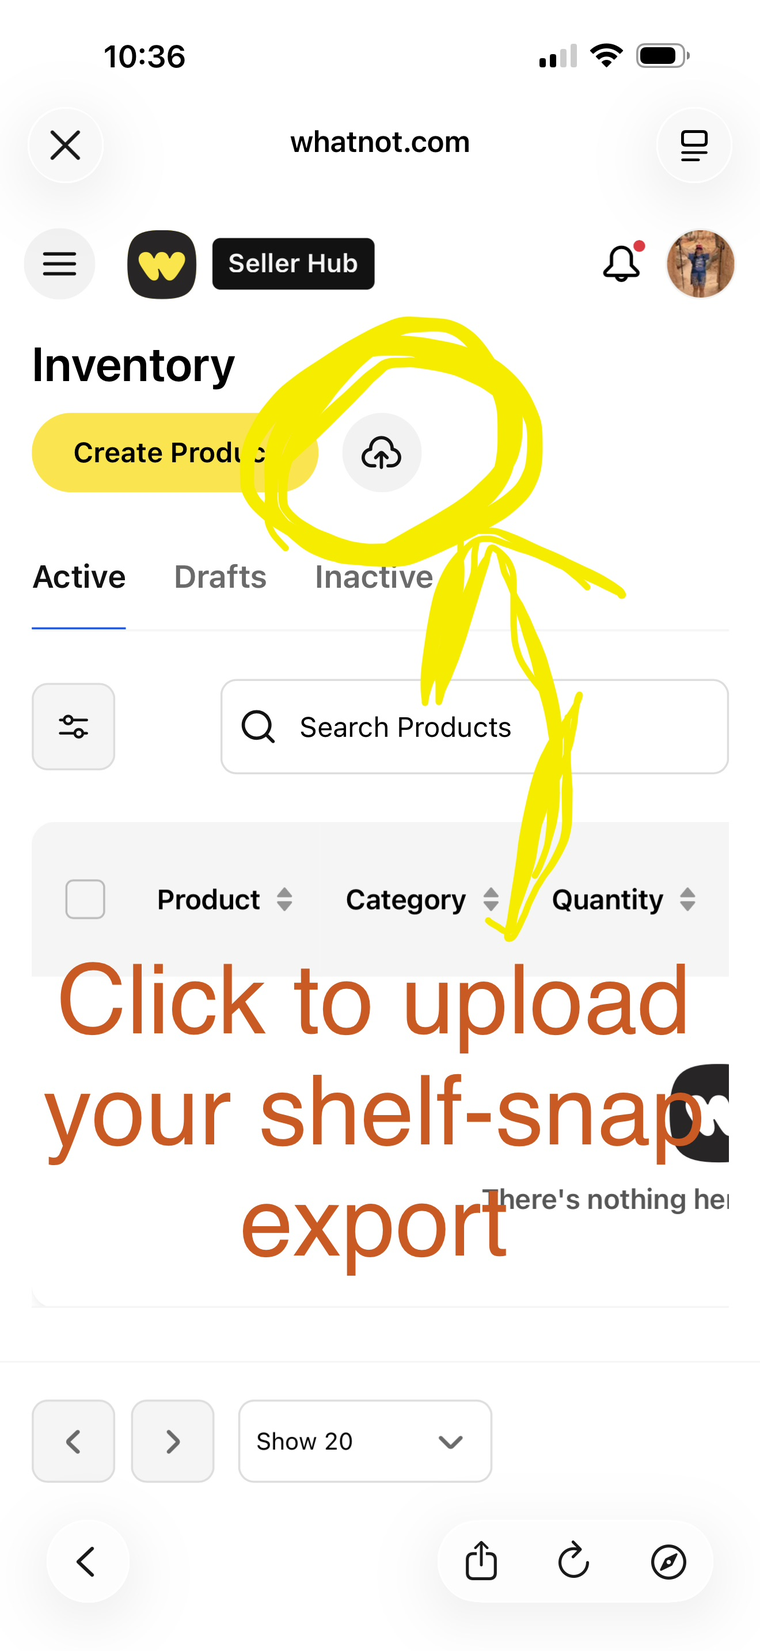
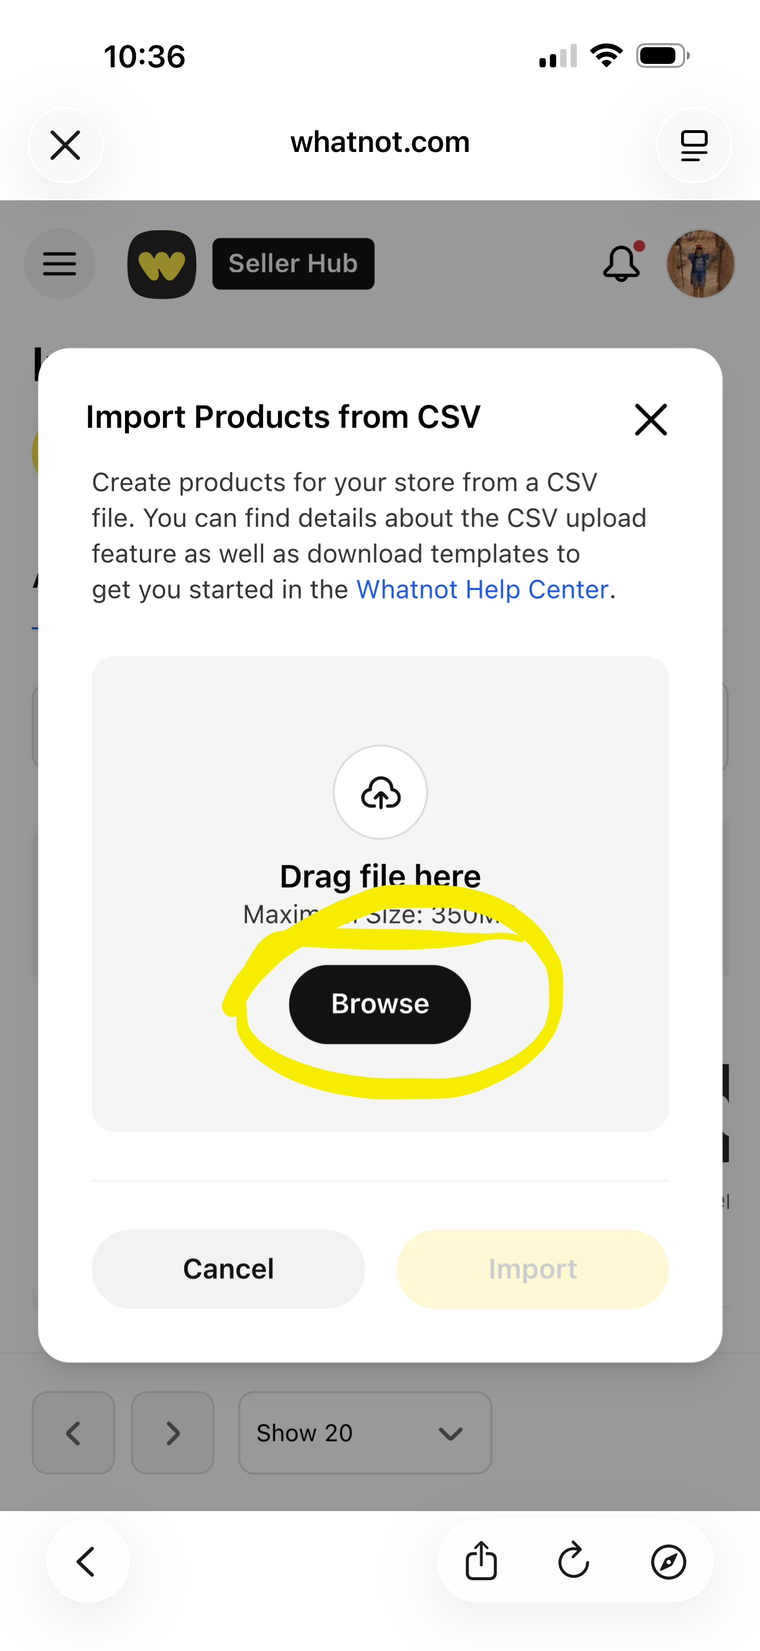
Then go to your Drafts — select all and add to your show! That's it.
I hope this helps. I'm working on more and more help info and examples for everyone. Thank you 💛
List your next haul in minutes, not hours.
Shelf-Snap is the bulk listing app built by a Whatnot seller, for Whatnot sellers. Free to download on iPhone and Android.